Craft Room Organizer
From Overflowing to Tidy: Craft Room Organizing Reveal
Not gonna lie...this is definitely one of my all-time favorite organizing projects! The sheer volume of supplies found in craft rooms always makes them fun to organize, but this was next level. This client was an absolute blast to work with and she was the key to getting every category sorted and defined. It was a very fluid process, as well. Until we sorted everything, it was impossible to know just what kind of containers would work for the different categories. We ended up using 12 x 12 scrapbook paper bins to hold her vast stamp collection (blue) and her page kit collection (pink). We created zones to make it easy for her to find everything. Tools are in one section, paints in another, and then the gorgeous wall of scrapbooking supplies. She also makes beautiful cards so we decided to buy a rotating card rack to display them and make it easy for family members to "shop" for what they need. The final touch was a rolling file cart to hold her very large sticker collection. Swipe to see the transformation. So, so, so fun!


Art Studio Home Organizing Refresh
Get ready for a treat! When this Castle Pines woman called saying she wanted to create an art studio that was both organized and beautiful, I was beyond excited. I literally geeked out the entire time I was working on this project. Gorgeous cabinetry and furniture with loads of storage holds all of her supplies. We created a watercolor and acrylic painting area, a craft area, a jewelry and metalworking area, and a fabric dying station. Matching bins and drawer organizers. Check. Turntables. Check. Color coding every paint, pen, pencil, piece of fabric and gemstone. Check...check...check. We also built a couple of drawer units to slide under her deep cabinets for a bit of extra storage. The result...a gorgeous and functional art studio!


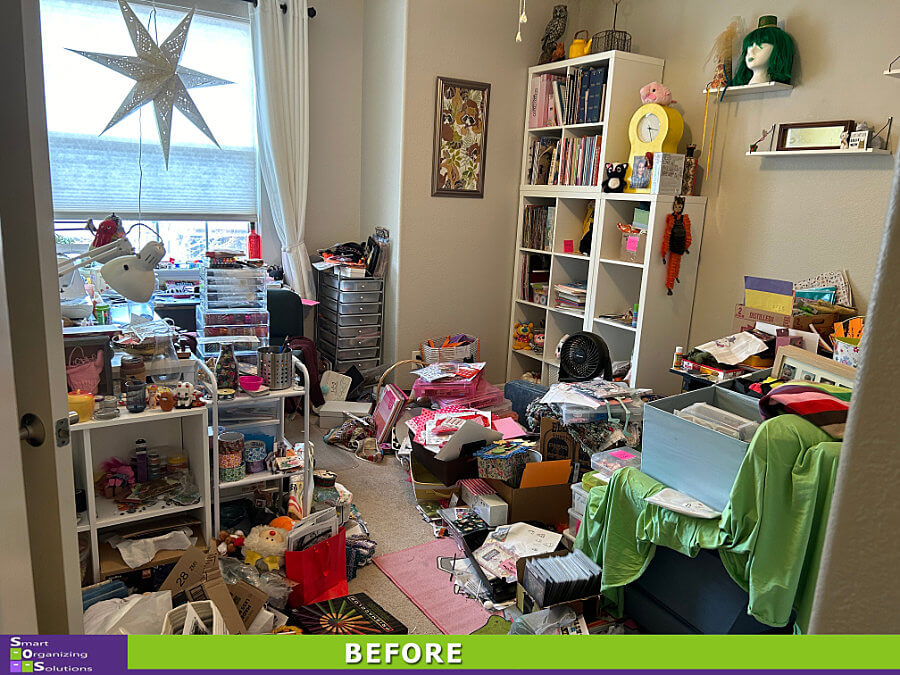
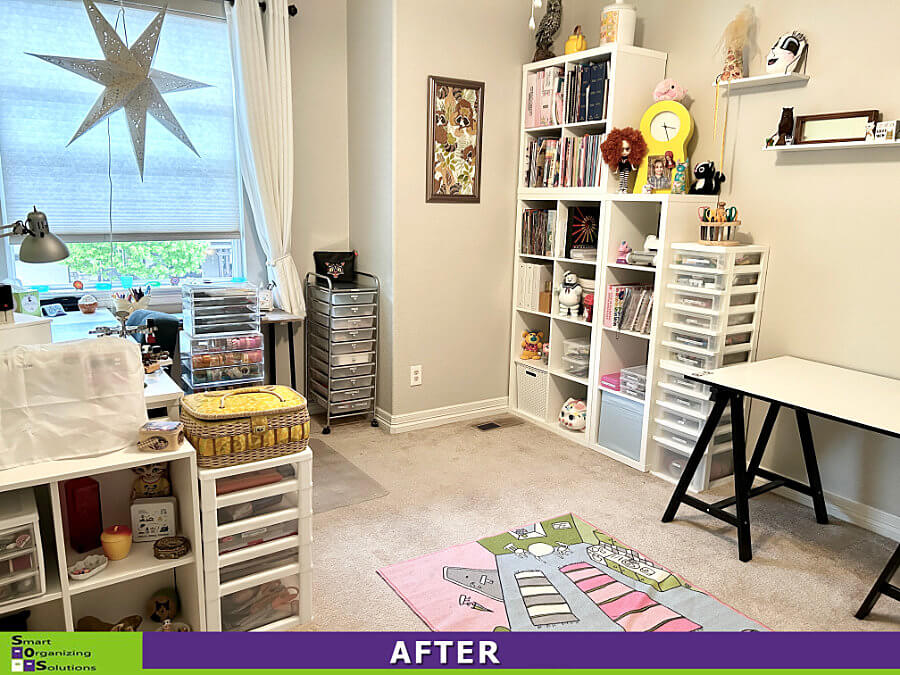
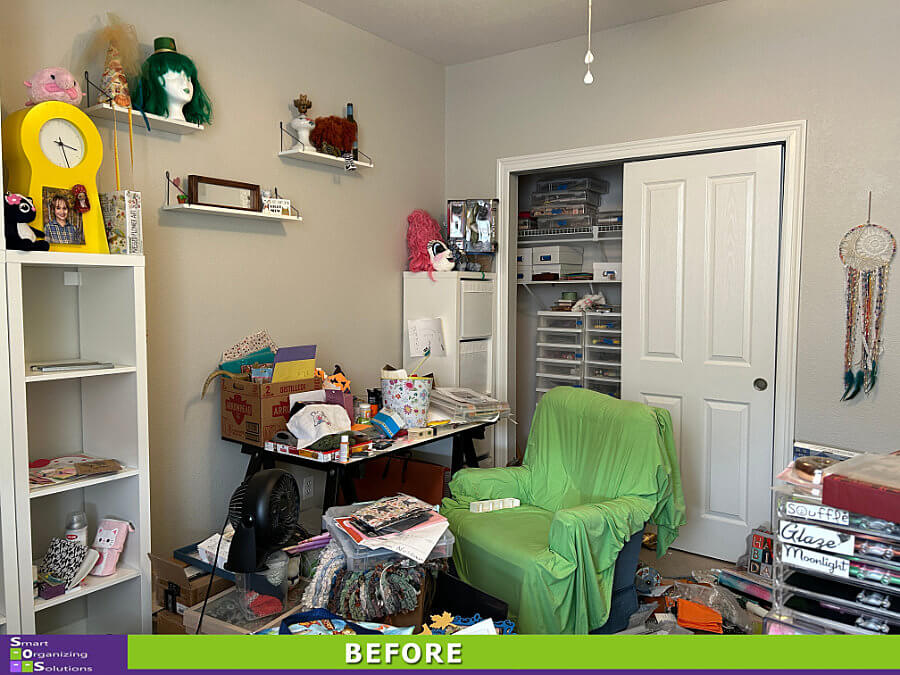
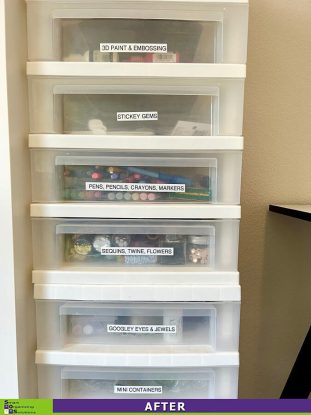
Decluttered Craft Room Makeover
I loved helping this client get her craft room in order. Where she saw a disaster, I saw nothing but fun and potential.
Craft supplies can take on a life of their own, especially if things don't have designated homes.
Every item, from the smallest of sequins to the largest of craft tools, was sorted into categories. We created piles for each type of craft supply so we could determine the size of bins we might need to contain them. We were able to use a lot of her existing boxes, bins and drawer units to create homes for everything. And, of course, my label maker worked overtime. 🙂
We also did a little decor edit. She has a lot of really fun, unique display items. But after talking with her, she agreed that she would give the "less is more" approach a try. She decided on her must-haves and we put everything else into a few bins that she could "shop" from when she wanted to freshen up the space.
Now this is a space she loves again and every once in a while, she'll text me that she's headed into her craft room to relax and get creative. That makes my heart so happy!

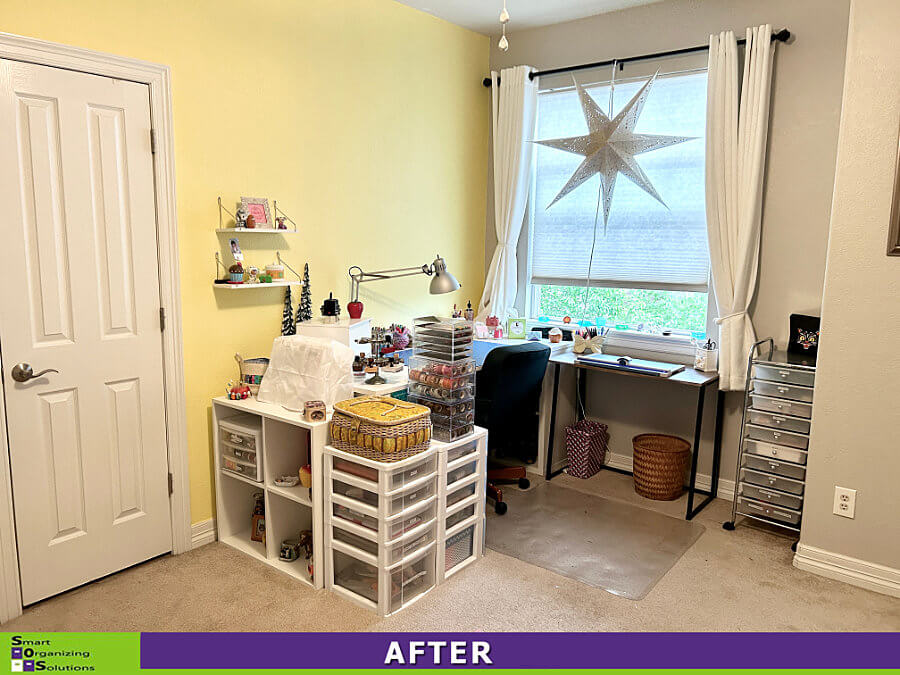

Tidy Craft Space Makeover
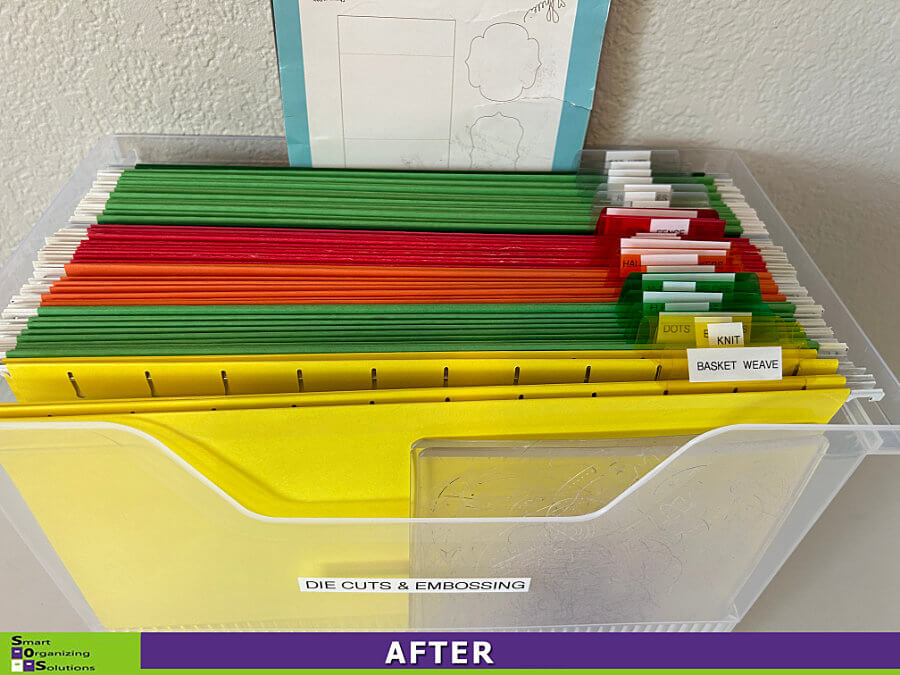
This was a super fun project! I may not have a crafting bone in my body, but I sure do like to organize craft spaces! This client actually had a really good start on this project. But we still had piles here and there, and some odds and ends that were hampering her creativity and productivity. We even got into the nitty gritty of color coding paper and categorizing stamps. I'll admit...I geeked out a bit. 🙂


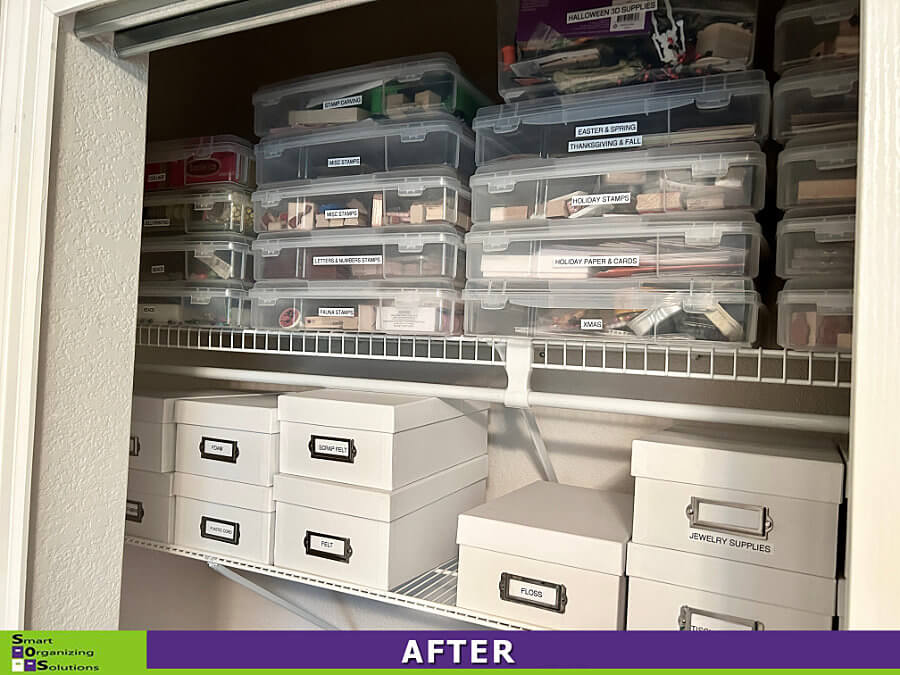
Craft Closet Transformation
I originally helped this Central Park client design this craft closet in her basement. It was a blank slate and we created a craft area and gift wrap station. But, like with anything, a great design doesn't always mean instant organization. When a few months had passed, she threw up her hands and gave me a call to come and do my thing. And boy, did I have fun!


Craft Closet Organizing Solutions
When the craft supplies started spilling out of the closet and into the office, this Denver woman called SOS for help. She wanted to start from scratch so the desk and drawer units she had in the closet were turned over to the kids. After designing a new solution using elfa from The Container Store, it was time to sort and purge. And boy did we! Just look at the results!


Home Organizer Transforms Creative Studio
I had the honor and the privilege to help design, set up and organize two art therapy rooms for a Denver metro non-profit organization that helps children ages 4 to 18. The work this group does is amazing and I wanted to help them get ready for their new class of kids. One room needed a complete solution to organize all of their art supplies and a place to store finished masterpieces. We turned to elfa from The Container Store to create a customized space with loads of drawers and shelves to hold all the various supplies. As you can see by the paints, markers and ribbons piled high on the table, we also needed to find a way to keep everything contained, but easy for the kids to grab, use and share. The other room already had wonderful built-in cupboards and cabinets, but again, all of the supplies needed organized and contained. We added roll-outs to the shelves in the lower cabinets so things don't get lost in the back. We also found clear bins to hold everything from googly eyes to glitter and glue so it's easy for the therapists and kids to grab what they need. Hopefully both of these rooms help this amazing organization provide the help all their kids need to heal.


Home Organizer Converts Bedroom to Craft Studio
When this Parker woman called to tell me she wanted to create her dream craft room, I was all in. This was such a fun project! Her grand kids don't sleep over as much now that they are older, so she said it was time to let go and create a space where she could have all of her craft supplies in one place. After walking me through her home to show me all of the different kinds of craft materials she wanted to move into this room, I was able to design a space that would hold everything and give her a great work surface. We turned to elfa from The Container Store and re-purposed some existing drawer units, shelves and a dresser to create a space where she can see everything she has. Everything is categorized and labeled. We even added some stick-on lights to give her extra lighting while working on her wonderful projects.


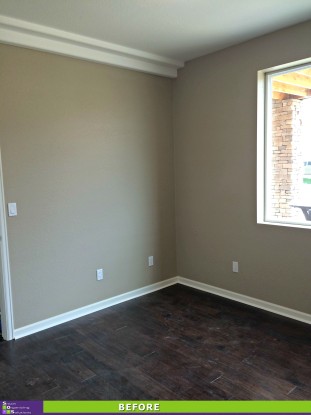
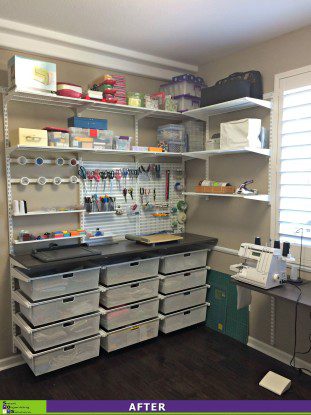
From Spare Bedroom to Tidy Craft Space
It’s not often that I get to work with a blank slate so I was excited when I got the call from a woman in Broomfield who wanted me to create a sewing space for her. The room also contained a closet that ended up being perfect for storage.
She knew she wanted to use Elfa from The Container Store. Once I came up with just the right plan to give my client a sewing space, cutting space and loads of storage, it was time to get it installed and organized.
Two large work surfaces mean plenty of space for multiple sewing machines and a cutting station. Loads of drawers keep fabric scraps, current projects and sewing supplies hidden and orderly. Pattern books and larger sewing supplies sit on open shelves for easy access. And get a load of the utility board. Scissors, pins and other small notions hang right above the work surface making it so easy to use and put away.
And where is all the fabric? A wall of shelves with adjustable dividers keeps piles of color-coded samples from toppling over. More drawers keep lesser-used items contained but still easy to access. And check out the hanging racks on the wall. They’re a great way to display current projects that still need a little more work.
Smart, organized and ready to go!